Archives

All posts for the month April, 2013

Jewelry time!!!

Published April 26, 2013 by emmaperez1961

Hi everybody!

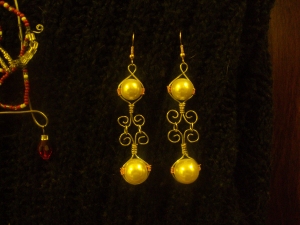
This is the piece of jewelry I was talking about.

I have been working with wire for about a year or so. It’s not easy though if your not familiar with it. It takes alot of feeling the material with your hands to get use to the wire. And lately since, I haven’t bought new wire, I’m been working with what I have. Which, it’s all 20 or 22 gauge.  It’s soft but not that pliable. So, I really have to work with it.

Wire has come in so many different forms. I noticed (Square, round, dead soft, soft). That, I easily get confused! The variety seems endless. Not to mention the colors! Geez!

So, anyway. I saw these component earrings that were so cute and said to myself, “I have to try this”. I have tried a wrapped ring, (Which I love) and a wrapped pendant (tree of life and stone). Which, I made my own stones in different colors.

The earrings didn’t come out exact but then, like I said before. I’m always in that trial and error stage. I can see that theirs a big range of what you can do with these components. Can’t wait to give it another shot soon.

On to my next project!!!  Sorry, I won’t be able to show that one. But, I was thinking about making another wire ring.  As soon as  I can, I’ll get underway with that and another sewing project too. Keep crafting!!!DSC07920
 

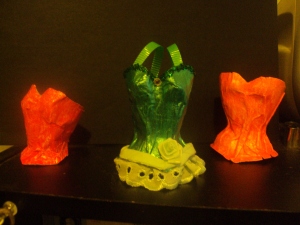
Step 3 (Corset) I’m done!

Published April 26, 2013 by emmaperez1961

I really had fun making this. And when I have more time, I’ll definitely make more. I just finished the green one. I don’t have any pink or orange like lace so, until I find some I’ll get the others done. I really need to get on that jewelry piece.

I do however want to start on a new project. Which, I’m hoping is original, cause I haven’t seen it out there. Yes, it deals with fashion but also in crafts. No, I’m not making a dress to wear.

I think the corset came out cute. You could put a bottom and put like a small candy inside as you give it as a gift. It’s up to you. I did have to still do more trimming. You just have to work with it. There are other ways to make molds but, this was the quickest one I  was able to come up with.DSC07919

Step 2 ( Paper Corset)

Published April 25, 2013 by emmaperez1961

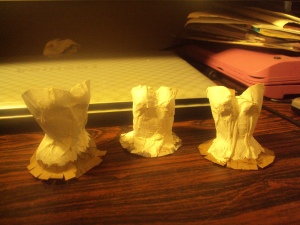
I’m still working on the corsets.  As you can see. Now, this was funny because I had no intention of making them. I was thinking on doing a jewelry project, but got side tracked when I fell upon a ballet paper dress while, looking up ballet music. Then, It took me to pinterest and then, someones’s blog.  The corset drew my attention more and more. Next thing I know, I forgot all about the jewelry piece I wanted to work on.

So, I have to hurry and finish so I can get back on track. I can’t wait to finish them and have them all dressed up.

Now remember, none of my projects are perfect. I’m always in the making process. Hopefully, I’ll step out of that stage and actually make something original that’s worthy to be sold. lol  Soon!!!

I trimmed a little more here and there and put a gesso coat before I actually paint them.DSC07918

WirlWind!!!! Yikes (Corset)

Published April 23, 2013 by emmaperez1961

Well, what can I say. Their has been so much tragedy in America lately. It’s a shame, that we still don’t know how to live in peace. All I know though, is that we still have to keep trying. So, on that note!

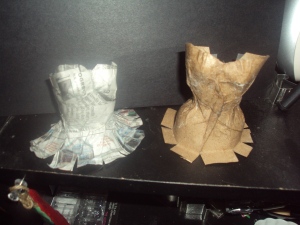
I know everybody is trying to figure out how to make the paper 3D paper corsets. Including myself. So, I decided to give it a try. I made one out of newspaper and one out of a toilet paper roll. The one with newspaper: I took a barbie doll and wrapped it tight with a piece of a plastic bag. I didn’t want the paper mache to get on the doll. Dipped the strips of glue to surround the bodice part for the corset. Then let dry. The second: Cut the back of toilet paper roll length wise. Press against bodice part of doll tightly. Cut about an inch off the bottom. Then, wet all around with the glue. Your shaping the corset as you go along. Ya, it can get a bit messy.  (No gloves. just use your bare hands) Then let dry. You might want to put a small piece of tape to hold it still in the back. Snip off and whola!!! You should have a heart shaped circle on top that forms the bust and sides. Just snip here and there to make it look right.DSC07917

The paper roll of course, took better shape! But , you can always buy plaster strips and use that as well. I hope this helps.

Changing it up!

Published April 12, 2013 by emmaperez1961

Wow, I can’t wait to get back to my sewing machine. Now I know why people love to sew. It’s really is fun. I mean, you have the pattern, the cutting, sewing the pieces together and whola! You actually made something. I do have one tip about refurbishing materials, especially when it comes to garments. Make sure you have enough material for interfacing , otherwise your better off buying the material or a little of something similar to better finish your project. Either way, you do save. And I realized that your garment will be better fitted and reinforced. I’m learning as I go. And on that note!DSC07912

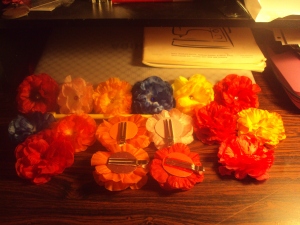
I had gone downtown a bit ago. And in a novelty store, I seen these cute, little, clip on flowers for your hair. They were priced for almost $6 for each one. I took one look and said ‘Hmm, these are easy to make’ Why they were priced so high, I don’t know. I thought. I could make a dozen for that price. And I did. I made them quick because I needed to get some out. I’ll definitely though will coordinating felt colors for the next batch, to make  the backs look a little more neater.

All you need is three sizes of silk petals, (or fabric petals) glue gun, felt for backing and clips. Really easy!

Getting things done.

Published April 11, 2013 by emmaperez1961

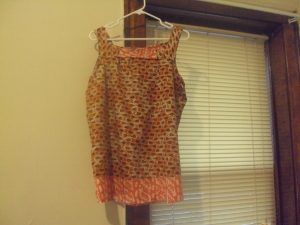
I finally finished my tank top. I’ve been wanting to do this for awhile but there is usually so many others things to do. So I hunkered down and said ‘No, your going to do this because you need  to practice. And alot of it.

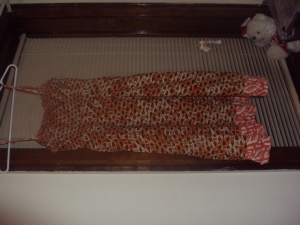
I usually go to the thrift so to go find materials I can use for other things. But I noticed that much of what I had purchased had alot of it. And much of the parts you need are already sewn, like a hem. So I took a summer dress, that of course wasn’t my size and made into a top. I also had a pattern that I found at the thrift store as well and made use of it. For starting anew since a few years, it didn’t come out that bad. Of course it could be better! I’m not trying to fool anybody.

It took me a couple of days. Unlike a pro, who would of had it done in couple of hours or less. lol So here is the dress. I’m not sure if I could put the photos side by side. If I can’t, I’m sure you’ll recognize it by the material in the next post.DSC07911 DSC07913

What’s next?

Published April 2, 2013 by emmaperez1961

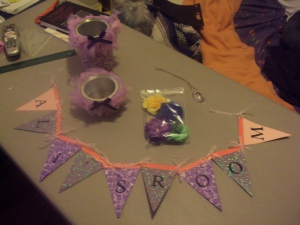
Well, I can’t believe Easter came and went just as fast as all the previous holidays. Easter of course is my favorite holiday. Hmmm, I wonder why? I was going to put something up before but I knew the theme of course was all about that cute little fuzzy bunny and his basket. lol  So, I decide to wait. My sister’s little granddaughter had just painted her room and her mother had put her on facebook doing the job. Which I thought was so cute. So I just had to make a couple of things for her new room. I was on a roll and just had fun doing it. I bet you can guess what color her room is. 🙂

I do have a few projects that I want to get underway with but right now since spring is here I’m working toward fashion. Yap, It’s time to take out the sewing machine.  Now, I’m not an expert on sewing by no means. But I’ve read the manual (lol) and watch ‘Sewing with Nancy, Martha’s sewing room, and It sew easy’. I like Angela Wolf and her guests. One of them had been on ‘Project Runway’!  Which I also really enjoy watching. I Have a lot of sewing to do. I’ll definitely take before and after photos. And if it comes out crooked, well, I know fashion is always looking for new trends. lol946